Showing posts with label published patterns. Show all posts

Thursday, 14 May 2015

Birthday Time!

Apparently it's Birthday Time!

Two of my friends have birthdays that are very close together  (and to make things really odd, they both knew each other -before- they knew me, but, didn't know that the other knew me until about last year!  Small world!)

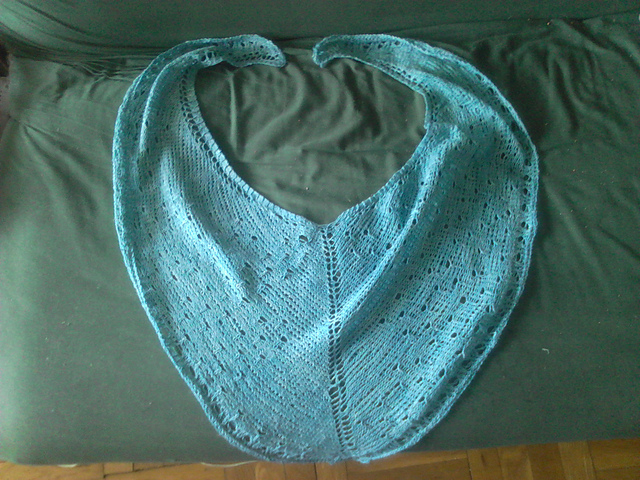
So, one friend is getting the prototype of my Raindrop Shawlette;


I will, eventually, post this as my own design to my Ravelry Store, and you can see more about it on my Designer's Blog, but I want to tweak the pattern first before I put it for sale, and that will take some time, considering I'm going to re-knit a second prototype.

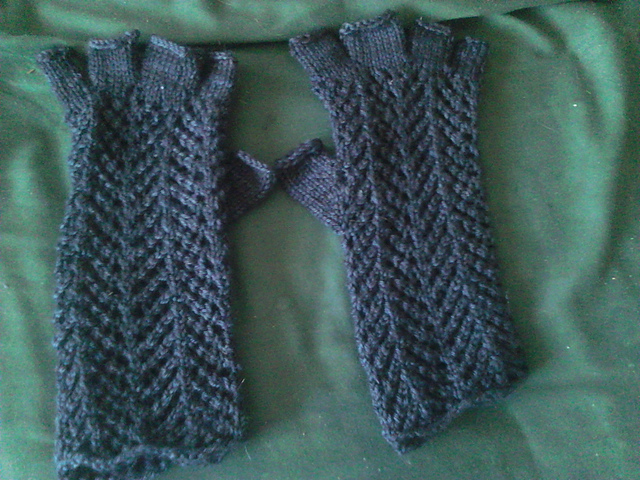
The other specifically requested a pair of Dragon Rider Gloves, just like the ones I made for my roommate (except hers are in black!):


I'll present them both at a Birthday party tomorrow night, and I'm looking forward to it!  (No, seriously, this friend throws amazing parties!)

So that's that for now.  It's nice to have a few projects off of the needles (have you seen how many WIP's I have!), and I hope both of my friends appreciate their new knitted things!

Thursday, 17 July 2014

Updates, News and other Stuff

Well, yeah.  I've gotten pretty far behind in updating my various projects here.  Anyone who has taken a look at my Ravelry Projects Page can see just how many more projects and things that I'm working on that I haven't really talked about here.

There are a few reasons.

1) I find I'm concentrating more on my actual crafting, nowadays.  In some ways, that's a good thing -- it means I'm spending more time knitting/crocheting then I am randomly reading the Ravelry forums (Rav is fun, but it's a time-killer!)

2) I've got -a lot- of projects.

3) (And really, the most important reason).

I've been thinking for a while about actually making something out of this whole knitting hobby, and after a lot of searching, I've decided to take some of my original designs (not featured here or on my project page) and begin the process of selling my patterns online through the Ravelry marketplace. 

At this point, though, I'm still only in the process of designing and knitting my prototypes.  And since I'm not a fast knitter, this may take a while.    That being said, I've rediscovered such a love of the fiber arts, that I might as well see if I can make that passion into something, even if it is just a small amount of income on the side.

Due to my previous experiences in a work-from-home envrionment, I've created a second Ravelry ID, as well as a second, more professional, blog.   The reasons for this is that way, the messages and e-mails go to a 'work' e-mail, and allow me to keep a psychological boundary between my work and my fun.  I made the mistake, once, of using my personal e-mail for a work-from-home . . . and that alone did a number on my mental state.  I've since become a very strong believer in separating 'work' from 'life', even if 'work' is a huge passion.

That being said, I do encourage anyone who has been following me here, to check out those other pages to see my ideas and progress.  And don't worry, I'm not going to stop updating here, but my updates may slow down a little.

Tuesday, 16 July 2013

Simple Ribbed Bag Pattern

Hello all!

I've had a couple of people ask me (or my roommate!) about a pattern for the headphone pouch I made my roommate.

So, as requested, here it is!


Simple Ribbed Bag

Gauge:  18 sts = 4 inches in k1 p1 ribbing (gauge isn't super important for this, though)

Yarn:  140 yards of  Red Heart Sport Solid (DK weight).

Cast on 56 stitches with a 3.75 mm circular needle or double-pointed needle set. (Use whatever size you need to get gauge, I usually knit on pretty small needles).  Join in the round, being careful not to twist.

Knit 7.5 inches (or however long you desire) in k1 p1 ribbing.

Eyelet row:  *(K1 P1) twice, YO* repeat between * 14 times total.
Next row: *(K1 P1) twice, k2tog* repeat between * 14 times total. 

Work 3 more rows (or more if you want a longer edging), then cast off in ribbing.

Finishing:

Sew the bottom end (the end without the eyelets) shut.

Create a twisted cord:  Cut 2 lengths of 3 to 4 feet of yarn, anchor one set of ends to an object, (tape it to a table, for example) and begin to twist them togther.  Twist it until it kinks up on itself.  Then, place both ends together and fold it in half. It should twist up on itself.  One end will be the folded end, the other end will be all 4 of the loose yarn ends.   Knot those ends together in an overhand knot.

(Sorry I have no pictures for this part -- if people want, I can get some!)

Feed the twisted cord through the eyelets of the bag.  If you want a shorter twisted cord, cut the knotted end and re-knot it at the desired length (be careful not to let it untwist!)

You can either tie it like that, and have two drawstrings, or you can 'button' the overhand knot through the small loop at the end of the twisted cord and have one drawstring (if the loop is too tight, gently untwist it for a moment and put the knot through.  It should re-twist itself.)

And there you have your very own Simple Ribbed Bag.

Final measurements are about 13 inches around and 8 inches tall, (without blocking) but this is extremely customizable if you'd like.

I suspect this would work well in any larger-weight yarn (worsted, aran).  I would suggest a fiber with a bit more stretch that won't sag out of shape over time.

Author's Note:  I'm sorry my pattern isn't as exact as I would like, I originally just made this on the fly and didn't really take copious notes at the time.  If anyone's having any trouble, or finds any errors, please don't hesitate to drop me a line -- you can leave a comment here.

Hope you all enjoy!