When it comes to casting off, I usually have the problem of my cast-off being -way- too tight for my project. This is ok, or at least tolerable, on a sleeve, or something that will be seamed.
It -sucks- for any edge that needs the elasticity. The only reason my Freestyle Shawl (an older project) didn't suffer from this is because it was knit on a bigger needle size, and even then, the cast off edge is far tighter then I would like.
So, since the Fall Lake Slippers are knit toe-up, and I was really worrying about that cuff. Would my cast-off make the cuff just too darn tight?
But then I learned about a technique called Tubular Cast-Off. It's a touch more time-consuming, but it's worth it if you don't want a tight bind-off edge. The pattern actually contains a really nice tutorial on this.
From my internet research, there seem to be several ways of doing this, but I'm going to show you the one I like -- and the one that the pattern specifies.
(P. S.: I'm still perfecting taking camera pictures of my work in a way that doesn't come out blurry. I'd like to think I'm getting better, but I do know they're still not the greatest pictures.)
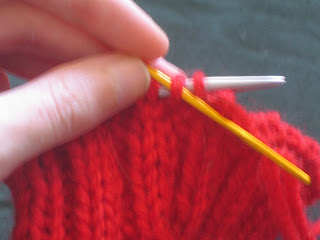
Start by doing at least one row of k1 p1 ribbing before your bind off row.
Then, measure across your work (or around if you're working in the round), and cut a tail of yarn four times longer then your measurement. Thread that through a tapestry needle.
Step one is to pass the tapestry needle through the first stitch on your needle as if to knit, slip the first stitch off of the needle.
Now, pass the tapestry needle through the second stitch on your needle as if to purl. Leave this stitch on the needle.
Next, keeping the yarn in front, pass the tapestry needle through the first stitch on the needle as if to purl and slip this stitch off of the needle.
Now, bring the yarn behind (not over the needle, you don't want a yarn-over here), and insert the tapestry needle between the first and second stitches on the needle, going from back to front.
The last step is to pass the needle, once again, through the second stitch on the needle as if to knit.
And that is that! Repeat this until all the stitches have been cast off, pull the tail through the last stitch, if necessary, and weave in the end.
As a note, this is actually a variant on grafting (aka kitchener stitch), so you'll see a lot of online tutorials asking you to split your work onto two needles. I like this method because you don't have to do that, but if you find that works better for you, then by all means.
This is a slower method then the typical cable cast-off, and it does mean that if you don't cut a long enough tail of yarn you could be in trouble. Also, because it does use the k1 p1 ribbing, it might not work for something like a shawl edge. But for things like cuffs (I'm betting this will see a lot of use when I try out toe-up socks!), it's actually really nice.


No comments:
Post a Comment